


Setting up Custom URL Device Integration on Haptique RS90
Integrate a device using Custom URLs for personalized control via HTTP (GET/POST), Telnet, or ADB commands.
Use this guide to create a custom device in the Haptique Config App and attach one or more actions that call URLs or protocol commands. This is ideal for devices that expose simple webhooks, Telnet endpoints, or ADB commands.
1 Prerequisites
- Ensure your phone and the target device are on the same local network (when applicable).
- Confirm the target device is reachable at the entered URL/endpoint or via the chosen protocol (
GET,POST,Telnet,ADB).
2 Open Device Pool
- Launch the Haptique Config App on your mobile device.
- Tap the Device Pool tab from the main screen.
3 Add a New Custom URL Device
- Tap the “+” icon at the bottom‑right of the Device Pool screen.
- Select Custom URLs from the device type list.
- Tap the “+” icon on the right to add a custom URL device.
- Tap Add Device at the top‑right corner.
4 Configure Device Details
- Enter a Device Name (this label appears in your Device Pool).
- Enter a Command Name (e.g., Power On, Volume Up).
- Select the Method:
GET,POST,Telnet, orADB. - Fill in the URL or Command for this action.
- Tap Save to store the command under the current device.
5 Add More Commands (Optional)
- Tap the “+” icon again to add additional commands.
- Repeat: provide Command Name, select Method, enter URL/Command, then tap Save.
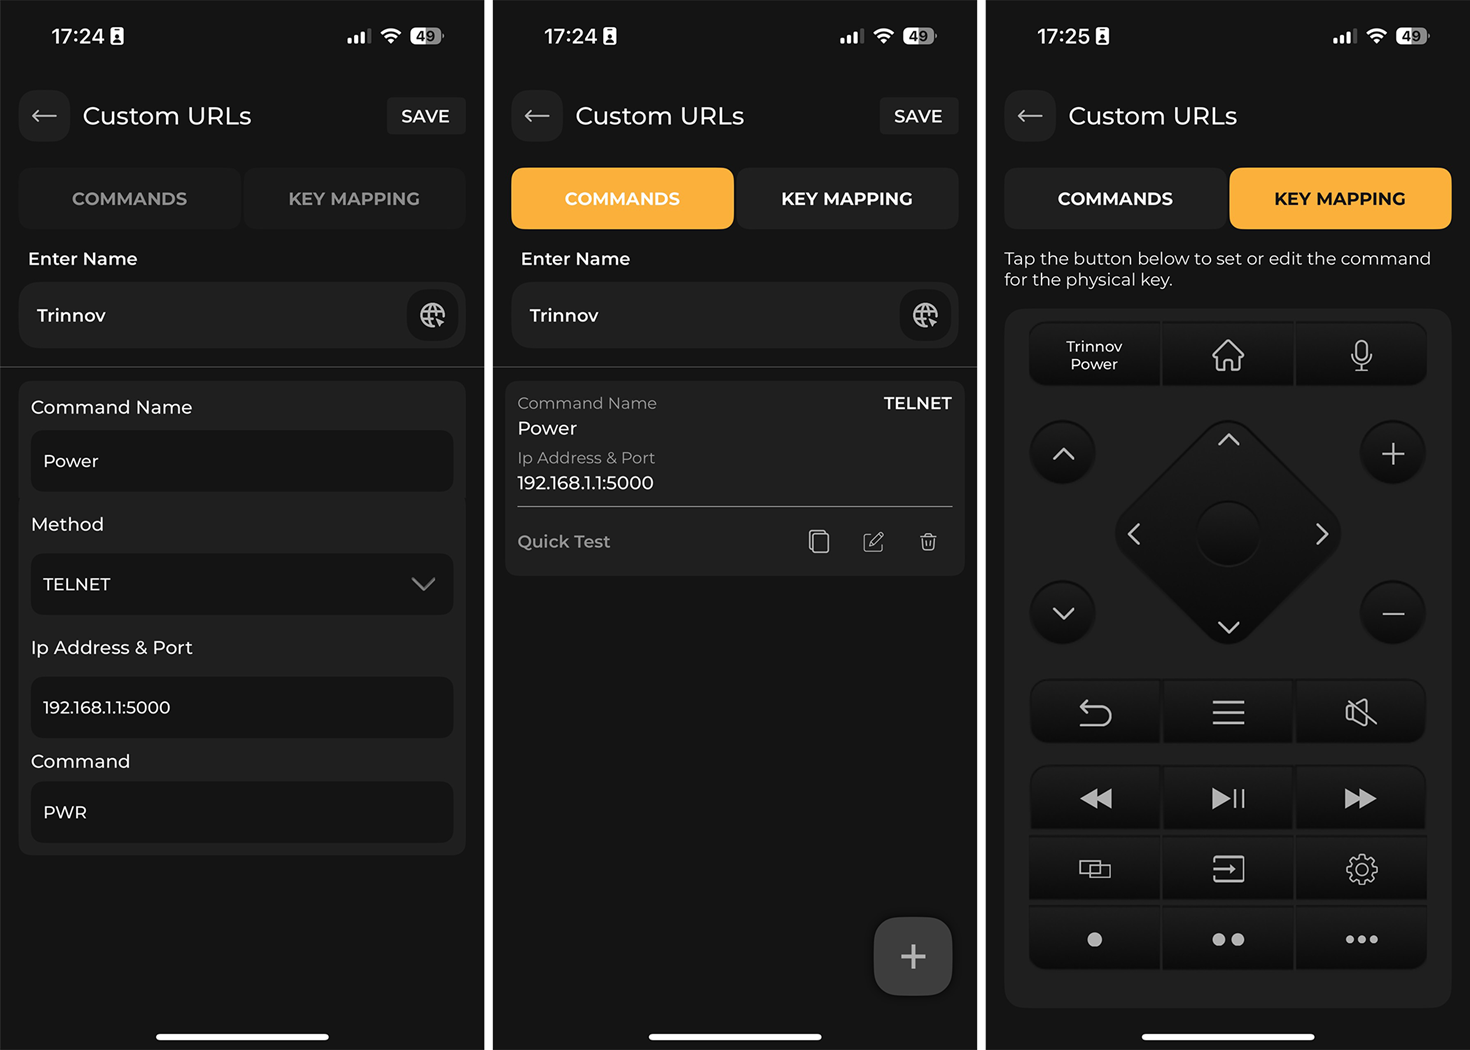
6 Key Mapping
- Tap the Key Mapping button.
- Tap a button to assign one of the added commands.
- Repeat to map all desired functions to physical buttons.
✔
Finalize Setup
Your custom URL device now appears in the Device Pool. Assign it to a room via the Room tab for quick access.
✓ Notes
- Ensure all entered URLs and commands are valid and reachable.
- For HTTP methods, make sure the endpoint supports the chosen method (
GETorPOST). - For Telnet, verify the device listens on the expected host:port.
- For ADB, ensure ADB over network is enabled and that the RS90 can reach the device’s IP and port (default
5555).

